I haven't posted much but I have built quite a bit. I've also had a few builds that didn't see the light of day.
So far I have finished;
Special Hobby Stuka - 1/72
Hasegawa Kawanishi Shiden K1J1 - 1/48
Andrea Miniatures Last Samuarai in 54 mm
Tamiya Crusader Mk 1 tank in 1/48
On the Go;
Italeri/Esci Valentine Tank - 1/72
Italeri/Esci Carro Armato M13/40 - 1/72
Tamiya Thunderbolt P47 D - 1/48
Andrea Miniatures Huron Indian Warrior - 54 mm
And the disasters
Eduard Fokker triplane V4 Conversion - 1/72 This was 99% done and i screwed the paintwork up to the point where it needed stripping (You try to do that on a Triplane). End result the wings got torn away and I didn't have the energy/motivation to fix it. Martha has it on her shelf, Not sure why.
Tamiya Supermarine Spitfire Mk5B Screwed the decals and paintwork up, then lost my temper and threw it. Moral of the story paint don't decal black walkway lines. lol I have never yet built a spit I liked. The darned original aircraft is so one of a kind its not something that really looks right in a model. (To clumsy looking imho).
Oh well that's it for the moment. My in progress list is supposed to get finished before year end lol no chance........
Oh forgot I entered the Last Samurai, Stuka and Shiden in the IPMS London and Ajax Shows.
Last Samurai came second at Ajax and first at London.
The Stuka came Second at London and Ajax
The Shiden came Third in London and didnt place in Ajax
My first real tank the Crusader went to Ajax and came third... Hrmmm perhaps my models are not as crappy as I think.. lol
Monday, November 12, 2007
Sunday, July 29, 2007
That Rotten dog can swim

Andy's first time in water. He seems to think he's a fish, must be those short legs of his. Of course being Andy immediately he came out the water he had to roll in the sand and get filthy, so back to the water to try to get some of the sand out.

Martha was much better at keeping him out of the sand..
Thursday, July 19, 2007
Andy gets a haircut

Sheesh, he looks like a real well behaved dog. Well for about 5 minutes. Later in the day he was rolling over in the dirt and generally ignoring any attempt to keep him clean.... Thats my Andy
Dang I really havent been posting
The last time I posted was in February and not a thing since thats really bad. Well I'll break out of my tardiness and post something. hrmmm Now what to post... Lets think......
Brb
Brb
Powered by ScribeFire.
Wednesday, February 14, 2007
Two other things I am working on are this Morane Monoplane in 1/48th scale and a 54mm native American from he early 1800's. The Morane has sat on my bench for close to a year. I don't normally build in 1/48th as I loose interest after a while, this model could be on my bench in the same condition a year from now. The figure is new and has only been underoated, I'll post more as these models progress.


Havent been posting lately


I have done a little bit of building though. Here are some pictures of the Fokker V4.
Monday, January 22, 2007
Modified Fokker wings for the V4
Now the Junkers J1 1938 edition is finally finished (I never want to see another Stuka again thanks very much). Its time to concentrate on the Fokker Triplane Prototype. Or Timmy the Tripe as I've nicknamed it. Sorry if you see the size of the wings it looks like a caricature of a DR1.... lol
Here are pictures of the wings. The modified ones are on the left and originals are on the right. The two lower wings are exactly the same span and are considerably reduced in span, the upper wing has been reduced by two ribs.
Next up is the fuselage interior. As you can see on the middle wing I have filled the cut where the fronts of the Spandaus would fit. I will have to make another section to fit just in front of the cockpit where the rear of the Spandaus would be mounted.


Sunday, January 21, 2007


Saturday, January 20, 2007
The Stuka is all repaired well kind of

I haven't posted for a week or so. I eventually went back and looked at JU87 I was building. In the last post, I put up photos of it before it took its one way dive onto the floor. At the time of the accident I put it all away (there were a lot of pieces that came off) until I felt like dealing with it. This past week I went back to it, it looked fixable lol kind of. I straightened out the PE airbrakes, fixed a big crack in the fuselage using (Apoxie Sculpt) I fixed the canopy with future and cut small antenna's from plastic rod, cut new struts for the tail from rod. Repainted where I needed to, gloss coated and sealed everything. A couple of decals got wrecked. I didn't have spare decals and was going to just leave it, but what the heck I've seen others paint there own markings so why not try myself. I had to cut a roundel mask and some Spanish crosses. I carefully sprayed white then black for the roundels and crosses, i was sure it was going to be a mess with bleed through under the masks but it worked. they actually look better than the decals. I'll try this more often, roundel decals have a nasty habit of not settling down very well or getting kinks in them when you use decal softening solution. Therefore airbrushing is probably a better option, you just need a circle cutter for the masks.
The model still doesn't look as good as it did, but I tried some post shading/weathering around panels with my airbrush to cover some of the damage. In 1/72 I think this is over kill and I wouldn't normally have done this. In this case it covers some nasty scrapes and scratches. In 1/48 post shading would look a lot better. Put it down to practice since I had never tried shading before. All I can say is use either a dark Grey or brown. You just need a tiny amount of paint whisk around the paint cup filled with thinner. Actually even that can be too much. It should look like dirty water. With my Iwata I can airbrush multiple times if its thin and this builds up the shading. My first attempt was a bit to thick since I had too much paint and not enough thinner so be warned if you try this.

Anyway I have a coat of flat to do and some last little bits to fix back on and the monster is done. I'll put pictures up later today.
Monday, January 8, 2007
I'm not going near the Stuka for a while so time for something different

A new project I think, something easy and fast to build.... On the wwi list lately I asked about the original Fokker Triplane prototypes.... Members Ivan Ruchesi and Tom Solinski posted sites that have photo's so its time to build a triplane I think... This is the so called V4 with the original wings...

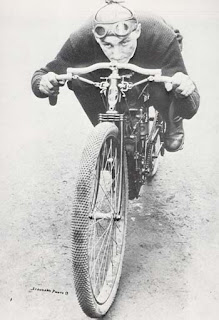
I have an Eduard DRI, so I'll use that as a source and cut the wings down, since from information that Ivan and Tom provided the lower two wings had the same diminished span. The DRI has i beleive the same fuselage as the DVI, I am pretty sure the DVI was was used as the fuselage for the V4 therefore this will be fine for the fuselage I work out the span by comparison with this photo. Ie rough ratios from fuselage to wings.
Pictures of the Stuka just before the disaster
I must have had ESP.... lol anyway here is as far as I got before Anton took the dramatic dive bombing sortie....


Saturday, January 6, 2007
Disaster struck
I was all set up to apply a clear coat over the decals and the hose of the airbrush just brushed the wingtip..... My Stuka went for its one and only divebombing sortie...
The PE Airbrakes are in bits, along with the ailerons, all pushrods, flaps, rudder and anything else that could fall off.
I think its repairable, but I dont have the heart to do anything more to it today. In fact I'm at that bury it forever stage..... Lets see what some time away from the model does....
Decaling
Just finished applying decals, The Special Hobby decals are very fragile indeed. One Roundel splinted into lots of peices and the cross on the rudder did the same. I'll have to mask and paint those. The rest of the decals went on ok. Felt very much like playing with dynamite. But the end result looks pretty good. Now sigh back to making masks and painting the missing decal and cross.
Monday, January 1, 2007
Canopy finished and unmasked

I still have to do some clean up, but the canopy came out rather well, even if I say so myself. ;)
Canopy is all Masked

Nothing like a mind numbing task, I watched "The Devil wears Prada" last night and masked the canopy with parafilm. The Movie was good and according to Martha based on a real person.... Eeks.
I finished the canopy masking by carefully trimming the frames out, hopefully with not to many scratches that I'll have to fill with future onethe masking is off. Today I'll spray interior colours first then camouflage.
I also made a list of all the things left to do. I find this helps in that I dont get distracted and working on things I never intended. Otherwise I'll just keep aimlessly working until i get fed up and never finsih the thing. Or in fewer words its a way to fend off AMS = Anal Modellers Syndrome = never finishing anything. Oh I feel so organised lol NOT.....
The photo above is the canopy masked and painted with the interior colour.
Subscribe to:
Posts (Atom)